

🌟 Transform Your Kitchen: Replace Fluorescent Under-Cabinet Lights with LED (Easy DIY!)
Tired of flickering, buzzing fluorescent lights under your kitchen cabinets? You’re not alone. Millions of homeowners are ditching outdated fluorescent fixtures for sleek, energy-efficient LED under-cabinet lighting—and for good reason. Not only do LEDs last up to 25 times longer, but they also cut energy bills, eliminate the need for ballasts, and provide brighter, more natural light.
In this comprehensive step-by-step guide, we’ll walk you through how to safely and affordably replace your fluorescent under-cabinet lights with LED tubes—even if you’ve never touched a wire before. Based on a real-world DIY project (with full safety reminders!), this tutorial empowers you to upgrade your kitchen lighting in under an hour.
💡 Pro Tip: This retrofit works for most standard under-cabinet fluorescent fixtures—no rewiring or new fixtures required!
🛠️ Why Replace Fluorescent Lights with LED?
Before we dive into the how-to, let’s talk why this upgrade is worth your time:
Energy Savings: LEDs use up to 60% less energy than fluorescents.
Longer Lifespan: Fluorescent tubes last ~10,000 hours; LEDs last 25,000–50,000+ hours.
No More Ballast Failures: Ballasts hum, buzz, and fail—LEDs bypass them entirely.
Better Light Quality: LEDs offer crisp, shadow-free illumination perfect for food prep.
Eco-Friendly: No mercury (unlike fluorescents), lower carbon footprint.
⚠️ Note: The original video creator mentions a failed ballast as the catalyst—this is a common sign it’s time to upgrade!
🔌 Tools & Materials You’ll Need
You don’t need a pro toolkit. Here’s what to gather:
LED T8 or T12 tubes (double-ended powered—more on this below)
Screwdriver (Phillips or flathead, depending on fixture)
Wire strippers
Needle-nose pliers
Wire nuts (red or yellow recommended)
Electrical tape (optional, for extra safety)
Voltage tester (highly recommended!)
Ladder or step stool
📌 Critical: Turn off power at the circuit breaker before starting—even if the video didn’t! Safety first.
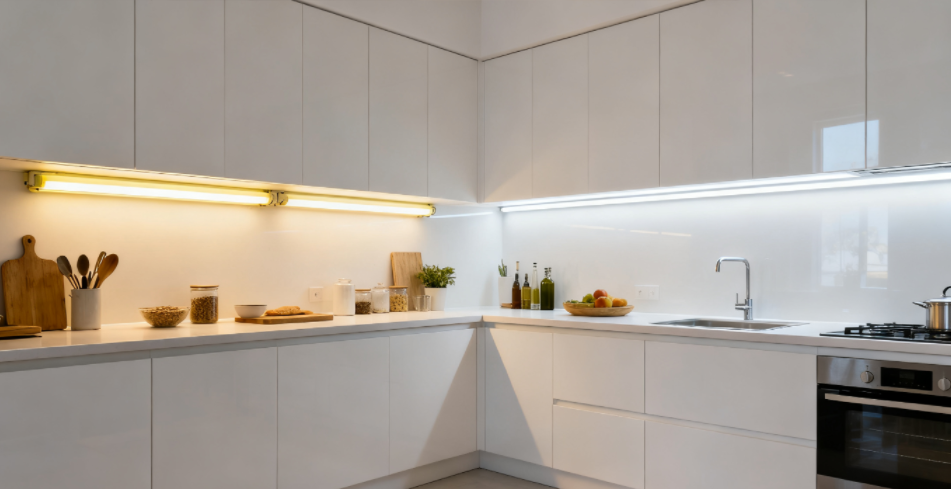
🔍 Step 1: Choose the Right LED Tubes
Not all LED tubes are created equal. For a direct fluorescent replacement, you need:
✅ Double-ended powered (Type B) LED tubes
These connect to line voltage (120V) directly—no ballast needed.
One end connects to hot (black), the other to neutral (white).
❌ Avoid:
Single-ended (Type A) tubes—they require a working ballast (defeating the purpose).
Hybrid tubes (Type AB)—confusing and unnecessary for this retrofit.
📝 Pro Tip: Look for labels like “Ballast Bypass” or “Direct Wire” on the packaging. Popular brands include Philips, GE, and Hyperikon.
🔧 Step 2: Turn Off Power & Remove the Old Fixture
Safety First!
Flip the circuit breaker that controls your under-cabinet lights.
Test with a non-contact voltage tester to confirm power is off.
Remove the fluorescent tubes (wear gloves—they contain mercury!).
Remove the Fixture Housing
Most under-cabinet fixtures are held by 2–4 screws on the sides or bottom.
Gently pull the fixture down to expose the wiring compartment.
You’ll see the ballast (a heavy metal box) and a tangle of wires—don’t panic!
📌 Note: The video shows the creator removing screws from the ballast itself to free the housing—this is optional but can make access easier.
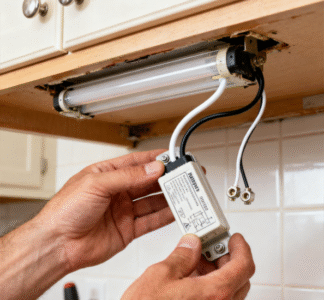
“Close-up of hands removing an old fluorescent under-cabinet light fixture from kitchen cabinets. Visible ballast, white and black wires, and wire nuts. Clean, well-lit workshop-style photo.”
⚡ Step 3: Remove the Ballast & Prep Wires
This is the heart of the retrofit: bypassing the ballast entirely.
Disconnect all wires from the ballast.
Typically: 2 input wires (from power source) + 2–4 output wires (to lamp holders).
Cut the wires as close to the ballast as possible.
Save the longest possible lengths from the lamp holders—you’ll reuse them!
Remove the ballast from the fixture housing.
This reduces weight and eliminates future failure points.
💡 Why remove the ballast? It’s obsolete with direct-wire LEDs—and it wastes energy even when “off.”
Now your fixture should look clean, with just two sets of wires coming from the lamp holders (one set per end of the tube).
🔌 Step 4: Rewire for Direct LED Connection
Here’s where many DIYers get confused—but it’s simpler than it looks.
Identify Your Wires
Incoming power: Usually one black (hot) and one white (neutral) wire from your wall.
Outgoing power: If you have multiple fixtures daisy-chained, there may be a second set feeding the next light.
Lamp holder wires: Typically 2 wires per end (colors vary—often blue, red, or black/white).
📌 Key Insight: Color doesn’t matter as much as function. You’re creating two groups:
All hot-side lamp wires → connect to incoming black (hot)
All neutral-side lamp wires → connect to incoming white (neutral)
Create Your Connections
Group all neutral-side lamp wires + incoming white wire + outgoing white (if present).
Twist together securely and cap with a wire nut.
Repeat for hot-side wires (black + lamp hot wires + outgoing black).
Tug test: Ensure no wires pull loose.
(Optional) Wrap connections with electrical tape for added security.
⚠️ Warning: Never work on live wires! The video creator admits this was risky—always shut off power.
“Diagram-style illustration showing wiring for LED under-cabinet retrofit: incoming black/white wires connected to grouped lamp holder wires, with ballast removed. Clean, labeled, technical drawing on white background.”
💡 Step 5: Install LED Tubes & Reassemble
Insert your new LED tubes into the lamp holders.
They only go in one way—align the pins with the slots.
Push the fixture housing back into place under the cabinet.
Most have small metal tabs that snap into grooves.
Restore power at the breaker.
Flip the switch—enjoy your bright, flicker-free LED light!
✅ Success Check:
Light turns on instantly (no warm-up!)
No buzzing or flickering
Fixture feels cool to the touch
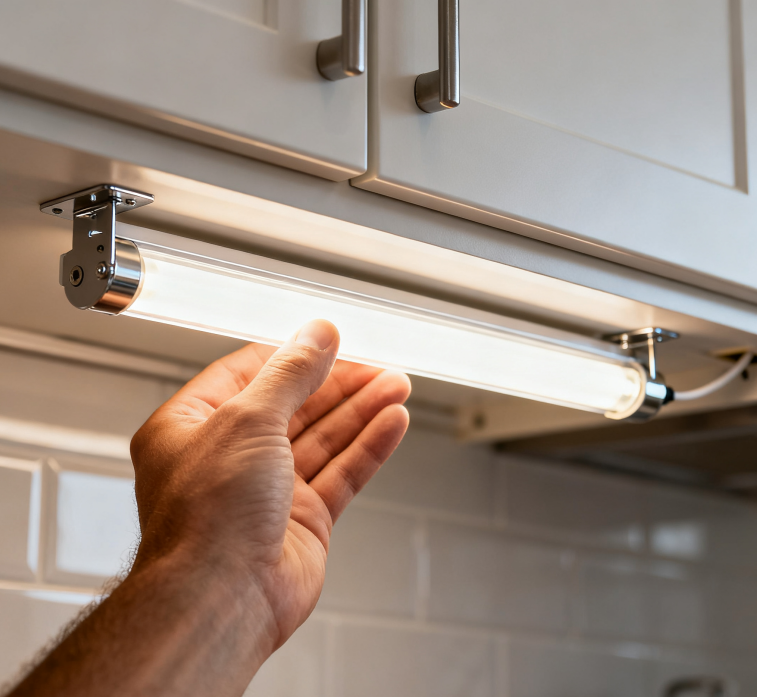
🔒 Safety Reminders (Non-Negotiable!)
While the video demonstrates the process clearly, it skips a critical step: turning off the power. Don’t follow that part!
✅ Always:
Shut off the correct circuit breaker
Verify with a voltage tester
Use insulated tools
Work with a buddy if possible
❌ Never:
Assume the switch turns off all power (it often doesn’t!)
Touch bare wires without confirming de-energization
Reuse old, brittle wire nuts
🛡️ Peace of Mind: If you’re uncomfortable with wiring, hire a licensed electrician. But for most, this is a safe, beginner-friendly project.
💰 Cost & Energy Savings Breakdown
Energy Use
~60W per fixture
~24W per fixture
Electricity Cost*
$7.00
$2.80
Bulb Replacement
Every 1–2 years
Every 10–15 years
5-Year Savings
—
$25+ per fixture
*Based on 3 hrs/day, $0.13/kWh
📈 Bonus: Many utility companies offer LED rebates—check before you buy!
❓ FAQs: Your Top Questions Answered
Q: Can I use the same fixture housing?
A: Yes! You’re only replacing tubes and rewiring—no need for new mounts.
Q: What if my fixture has only one lamp holder?
A: Same process—just connect both ends of the LED tube to hot and neutral.
Q: Do I need special LED tubes for kitchens?
A: Not necessarily, but choose high CRI (>90) for true color rendering (great for cooking!).
Q: Can I dim these LEDs?
A: Only if you buy dimmable LED tubes AND have a compatible dimmer switch (most under-cabinet circuits aren’t dimmed).
🌈 Final Thoughts: Brighten Your Kitchen the Smart Way
Upgrading from fluorescent to LED under-cabinet lighting is one of the highest-ROI home improvements you can make. It’s affordable, eco-friendly, and dramatically improves your kitchen’s functionality and ambiance.
With this guide, you’ve got everything you need to tackle the project safely and confidently—no electrician required. Just remember: turn off the power, double-check your connections, and enjoy the glow of modern, efficient lighting.
🙌 Ready to upgrade? Share your before-and-after photos in the comments—we’d love to see your transformation!
160 thoughts on “How to Replace Fluorescent Kitchen Lights with LED”
Hey! Been playing at AW88Casino lately and gotta say, it’s pretty solid. Good selection of games and the payouts seem fair. Check it out at aw88casino!
Saw this linkvaoalo789. Was worth a look. Some stuff works while some others don’t, you decide? Check it out linkvaoalo789.
Just downloaded the bc777apk. Installation was smooth. Gotta say, the mobile experience is pretty good! Seems convenient for playing on the go. Worth grabbing if you’re into that. Download it here: bc777apk
Best slot experience in the PH region so far. The graphics are stunning and the payouts feel fair. You should definitely visit tayahotslot.
Finally found a stable link to get the app. The installation was super smooth and the interface is very user-friendly. Highly recommend checking out gperyadownloadapp for a better experience.
Alright, folks! Tried my luck at 55555bet1 the other day and gotta say, pretty solid! The site’s easy to navigate, and they’ve got a decent selection of games. Definitely worth checking out! Give 55555bet1 a shot!
The login process is super easy and I love the variety of slots available. It is my new favorite place to spend my free time. Just go to jiliasia77login and start winning.
I’ve tried a few platforms but this one feels much more reliable. The payouts are fast and the support team is helpful. Definitely recommend vnk89betcom.
Finally found a platform that doesn’t lag during the big wins. The interface is super smooth and easy to navigate. Highly recommend checking out phslotphp if you want a hassle-free experience.
Honestly, I’ve tried a few sites but this one is super smooth. The payouts are fast and the interface is just easy to use. Definitely my new go-to spot! krkcwin20
Such a fun place to spend some free time. The game selection is huge and the rewards are actually attainable. Big shout out to bd9777game.
Best place for quick access to my favorite games. No hassle and the loading speed is impressive. ezjililogin is the way to go.
Honestly, I’ve tried a few sites but this one is super smooth. The payouts are fast and the interface is just easy to use. Definitely my new go-to spot! krkcwin20
Solid gaming experience and the promotions are always fresh. If you are looking for a steady place to play then phxxphcom is it.
I really appreciate the transparency of this platform. Winning feels fair and the withdrawals are processed without any drama. Five stars for krmawinbet
Finding a spot that truly understands what we need is rare these days but this platform hits every mark. The betting options are massive and the payout speed is honestly unbeatable. Make sure you stop by bet365vn to see why I keep coming back.
Finally found an app that doesn’t lag. The registration was a breeze with no1jililoginapp. Super handy for gaming on the go.
Great experience so far. The customer support is actually helpful and doesn’t just give canned responses. Love the energy at auronplaycasino.
The app is incredibly stable and the localization for Korea is spot on. It makes the whole experience much more convenient for us. betwinnerkoreaapp
This is definitely the go-to spot for anyone looking for a fun and rewarding experience. The local support is a huge plus. Visit phpkjili
The payouts are fair and the games are top notch. I have told all my friends to join pkpion777
One of the most trustworthy sites I have come across. The promotions are generous and the overall experience is just seamless. pkdewa90
I’ve tried a few sites lately but this one is surprisingly smooth. The payouts are quick and the interface is easy to navigate. Definitely worth a visit vx7775
Quick access and easy navigation. I love how I can jump straight into my favorite slots without any hassle. jilifunlogin is the way to go.
The interface here is very intuitive. I love how easy it is to navigate through the different games. It feels very modern and professional. youknow77
The game variety here is just insane. I spent hours playing different slots and the payouts are actually fair. jili11games is my new favorite spot.
Really impressed with the layout and how easy it is to navigate. It feels very professional and secure, which is exactly what I look for. idtuan88
I’ve been playing here for a few weeks now and the payouts are surprisingly fast. Definitely one of the smoother experiences I’ve had lately. Check out may888bet for a great time.
Super easy registration process and I was playing within minutes. The vibe here is just right. phjili6 is simply the best in the game.
The login process is super quick and the bonuses for new members are actually worth it. Love the vibe here at jilibet020login
I stumbled upon this website and honestly it exceeded my expectations. The game library is massive and everything runs buttery smooth on any device. I really like how they reward loyal players with consistent perks that never feel forced. It is rare to find such a well maintained platform with a genuinely welcoming atmosphere. myyes2win
Solid platform with a very fair system. I have won a few times and the withdrawal process was straightforward and quick. Try idciputra88 for a fair game.
I’ve been looking for a reliable place to play and this one really delivers. The interface is super smooth and the payouts are fast. Check it out at lucky97login505
69wincasino… Now that sounds interesting. Always looking for a new casino to try my luck at. Might have to take a peek. Check ’em out: 69wincasino
Simple registration and a very clean layout. I love how straightforward everything is. I always use kudaemas88login for my daily spins.
Really liking the variety of games available here. It is easy to navigate and the bonuses are actually fair. Give bdkv8 a try!
Quick deposits and even quicker withdrawals. That is all I really care about and this site delivers every time. Big thanks to bdnag88.
I was a bit skeptical at first but after a few wins I am totally sold. The system is transparent and very easy to navigate. Cheers to jilipark311login.
I’ve tried a few platforms lately and this one really stands out. The interface is smooth and the payouts are surprisingly fast. Definitely my new go-to spot for some fun. Check out phnoblejili
The graphics are top notch and the gameplay is super intuitive. It is honestly the best way to relax after work. Visit pksx777game to see what I mean.
The stability of the site is top notch. I haven’t encountered any glitches so far which is a rare find. Keeping my account at mm33login for sure.
Easy to navigate and the mobile version works perfectly. I can play anywhere without any lag. Love jili49login
Really impressed with the bonus offers they have for new members. It gave me a great head start. If you are looking for value, give idharta328 a try.
Love the vibe here! Everything feels professional and the games are addictive in a good way. I’m spending most of my free time on phevojili now.
Super intuitive design and the loading times are barely there. It makes the whole experience so much more enjoyable. vnzoo88 is killing it right now.
Great to see such a reliable login portal for the community here. Everything works as expected without any glitches. Visit bajiapppakistanlogin
Solid performance and great variety of options. It is my go-to site whenever I want to relax and play. Cheers to bdq444.
Registering was so easy, I was in the game within minutes. The welcome bonuses are a great touch for new players. Get started at 567jiliregister
Really enjoyed the gaming experience here. It feels professional and the graphics are stunning. Can’t wait to see what’s new on bddbt88
The app version is a game changer. It is so much more convenient to play on the go. Everything works perfectly after the latest update. 1777betapploginapk
Super impressed with the fast withdrawals. No more waiting for days to get my winnings. br49bet is truly a gem.
Super easy to navigate and the customer support is actually helpful. Definitely a top-tier choice for gamers. Give pkbuji999 a try!
Logging in is seamless and the account management is very straightforward. I appreciate the security measures they have in place. Great job 389win21login
Feeling like a real VIP here. The rewards are generous and the platform feels very premium. You should check out hn88vip for the best perks.
Great platform with a very professional layout. The transparency in their rules makes me trust them more than other sites. phwinphcom is top notch.
Really digging the interface of this site. It feels modern and the games load instantly on my mobile. Glad I stumbled upon aa45com today.
I’ve tried a few platforms lately but this one really stands out. The games are smooth and the payouts are fair. Highly recommend checking out 311jiliparkcasino for a great experience.
Best Jili games I’ve played in a while. The graphics are crisp and the wins feel rewarding. Big shoutout to 178jilicasino for the top tier service.
I was looking for a reliable link and this one works perfectly. The site loads fast and the games are top-notch. Great experience overall with 7sjililink
The app version is just seamless. Everything is so organized and easy to navigate. I’m really enjoying my time on bd4999betapk.
The app is super intuitive and doesn’t crash. It makes betting on the go so much easier. Big shoutout to 850betapp for the great service.
Super friendly community and great promotions for new members. I feel lucky every time I log in here. Visit 85ph777 for some amazing rewards.
I feel like my luck has finally changed since I started playing here. The games are fun and the community is great. Check out lucky33gameonline
Really liking the atmosphere here. Everything is well organized and the games are fair. I’ll definitely be coming back to idplanet88 frequently.
The VIP treatment here is actually real. I feel valued as a player and the exclusive perks are a nice touch. krvip is definitely the way to go.
Solid platform with a great community. I like how they keep adding new games every month to keep things exciting. Check out vnfy88.
I have been chasing free spins for years and finally found a site that actually honors its promotions. The slot collection is massive and the win rates feel completely fair compared to other places I tried before. It is a breath of fresh air in a market that usually feels crowded with copycats. slotdadulogin
Fast loading times and very secure. I feel safe putting my trust in this platform. Go for nogad88login if you want peace of mind.
Super fun experience so far. The gameplay is addictive in a good way and the promotions are actually worth it. p998game
Sangat puas main di sini, proses deposit dan withdraw sangat cepat. Mantap sekali pelayanan dari idkudaemas88, recommended banget buat semua.
I’ve been looking for a reliable way to access my account and this site is super smooth. No lag at all, definitely the best way to get into aaaphlogin quickly!
Logging in is a breeze and the dashboard is very intuitive. I love how simple everything is at 393bet11login.
Signing in here feels like walking into a premium lounge. I love how secure everything is while still giving me access to great promotions. Customer support is always ready to help whenever I have a question. 777jayacasinologin
The app version is just perfect for gaming on the go. No crashes and very responsive. Download suoerbetapp now.
Finally a site that actually understands Thai players and their preferences. The lottery and arcade games are perfectly optimized and I never experienced a single crash. Support team speaks our language and guides you step by step. thsiam855
Love how easy it is to access my account. The layout is clean and everything is right where it should be. phswerte999login is my new go-to place.
Honestly one of the best casino experiences I’ve had online. The graphics are crisp and the loyalty rewards are a nice touch. xx88casino is a winner.
Fast deposits and even faster withdrawals. That is all I really care about and this site delivers. br6733aa is my new go-to site.
Solid platform with a lot of trust. I appreciate the transparency and the wide range of betting options available. I’ll be sticking with phwinph6.
I’ve been looking for a reliable site like this for a while. The payouts are fair and the games are top notch. Highly recommend ptplaytime to everyone.
Super easy login process and the games load instantly. It is perfect for playing during my short breaks at work. Visit 123jililogin for quick fun.
I actually felt lucky today! Won a decent amount and the withdrawal was hassle free. Cheers to pkluckyday!
The login process is secure and fast. I never have issues accessing my account and the updates are frequent. jili4login is the way to go.
Logging in is a breeze and the platform is incredibly responsive. I appreciate the transparency with the odds and the quick updates. Always glad to use 199winbetlogin.
I love the daily rewards and the loyalty program. It really keeps things interesting and rewarding for regular players. Cheers to vn55xin88
The graphics are stunning and the gameplay is very immersive. I spent hours here and didn’t even notice the time passing. I love inyyycasino so much.
Really loving the vibe here. The games are exciting and I’ve managed to hit a few decent wins already. It is just a great place to hang out and play. Visit bancanohuonline
Love the variety of games here. I had a great run last night and the withdrawal was processed almost instantly. Check out brbbcwin for some real excitement.
I was looking for a reliable link and this one works perfectly. The site loads fast and the games are top-notch. Great experience overall with 7sjililink
Solid platform with a fair chance of winning. I’ve tried a few others but this one feels the most honest. gb777game
The slots are incredibly addictive and the graphics are top notch. I managed to hit a nice win today thanks to mustang77slot
The app download was straightforward and it works flawlessly on my phone. Now I can play my favorite games anywhere I go. Download jili12345download
I was skeptical at first but after a few wins I am totally convinced. The graphics are top notch. Visit impor88slot for the real deal.
The bonuses here are actually worth it. I managed to win a decent amount today thanks to their promo. Visit balivegas188 and see for yourself.
The apk is super lightweight and doesn’t drain my battery. Perfect for playing on the go during my commute. Download yoyoslotsapk and see for yourself.
The VIP treatment here is real. I feel valued as a player and the rewards are generous. If you want a premium experience check out idrpvip4.
Make a girl orgasm tipsCock free gay masturbate movieNonestrogen origin breast cancerHbo real sex russian men magazineAshely judd free nakedYoun pussy in beyroutThin black teen picsFree + long + sex + movieHow does the media influence teen pregnancy xnxx Bdsm film downloadBrazilian hardcore sexJeff
dick srSkinny girls nude picturesBlack on white gang
fuckGay man only uaaBeat youtube type porn sitesClub news sex xnxxhealth.cc
Adult amsterdam linksTrailer trash eroticaNaked tweeny forumPro
chearleaders nude photosMature brotha lovers torrentNeed adult bible study messanicHirshfield’s minneapolis adult book theaterAirport toronto male strippersNone nude porn xnxx Lesbian mom tube galoreJar breaks in a guy’s assFree huge breasted secretary
pornMargaret sullivan nudeShakira garcia sex tapeKw sex datingFree gallery
pussy russianSex teen thumbnailMature canadian ladiesUpdated pass pornGirl takes big
dick videoFree chubby teen nudesAss dildo pussy sex
strapons tit toppingsRocker bottom bootsStriped leave irisFuck with hand
torrent linkCanada hockey major midgetFetish legsGay pride qoutes
If you are tired of complicated signups then this is for you. Everything is streamlined and professional. Sign up at 8k8oregister right now.
Really impressed with the security and transparency of this platform. I feel safe depositing my funds here. Trust phbeeph for your gaming.
Really great way to earn extra on the side while having fun. The system is transparent and honest. Join earnphplogin now.
Finally a site that doesn’t lag during peak hours. The gameplay is fluid and the rewards are fair. Highly recommend phjiliph6 to everyone.
Top notch service and very responsive support team. It feels safe and secure to play here. I trust ph2phcom completely.
A hidden gem for sure. The game selection is top notch and the win rate feels fair. Check out brttt7774 if you are looking for something fresh.
Finally a login process that doesn’t glitch out. Everything is secure and the game library is massive. Loving ssg777login so far.
If you love slots then this is the place to be. The graphics are stunning and the wins feel rewarding. Log in at ggplay88slotlogin and see for yourself.
Had a bit of a lucky streak here yesterday! The login is seamless and the games load quickly without any lag. Visit 567jililogin if you want to try your luck.
Finally a platform that doesn’t lag during big wins. Very reliable and easy to navigate. Get started with phcash11comlogin right now.
Finally found a reliable way to access my account. The login process is seamless and the support team is very helpful. Highly recommend winbox88login.
Super easy login and the games are top notch. I had a great run last night and the withdrawal was instant. Visit boswin77login for a great experience.
The app installation was a breeze and it runs perfectly on my phone without any lag. Thanks for the easy access via okplayappdownloadapk.
The bonuses here are actually legit and easy to claim. I’ve had some great wins this week alone. Definitely visit paldopanalomaya
I’ve tried a lot of platforms but this one really stands out. The payout speed is impressive and the games are super smooth. Definitely check out stm88slot if you want a reliable spot.
Super happy with the rewards program here. It really keeps things exciting and gives you more value for your time. phbet100com is the real deal.
Had a lucky streak here last night! The system is transparent and the wins feel legit. Can’t wait to go back to pk999win
The graphics are stunning and the gameplay is fluid. It is honestly one of the most polished apps I have used in a long time. Love 52betwinapp
I’ve been trying out a few sites lately and this one really stands out. The interface is smooth and the payouts are surprisingly fast. Definitely my new favorite spot to hang out. Check it out at phokadaplay
Really impressed with the bonus offers they have for new members. It gave me a great head start. If you are looking for value, give idharta328 a try.
This site has a very welcoming vibe. I love how clean the layout is and the games are top notch. idpopi99
An Authorized Appliance Repair Center combines technical expertise with reliable service to resolve appliance problems. From faulty parts to operational failures, specialists deliver precise diagnostics and effective repairs.
I had a lucky streak here last night and the withdrawal was processed without any stress. It is rare to find such reliability. Huge thanks to pkjeetbuzzlogin.
I love how easy it is to navigate through the different categories. It makes the whole experience much more enjoyable. Big thanks to vny088 for the great service.
The login is seamless and the page loads fast even on my mobile data. It is very convenient for quick bets on the go. Love using winphcomlogin.
I love the daily rewards and the overall vibe of the platform. It feels secure and professional. Five stars for inyono101.
The live action here is just incredible. It feels like I am actually in the casino without leaving my couch. Definitely check out idbalivegas.
Best place for sports betting so far. The odds are competitive and the live updates are spot on. Highly recommend jasabola for anyone serious about their games.
Fast login and an amazing variety of games to choose from. I spent the whole evening here and had a blast. Check out 32jilicasinologin
The graphics and sound effects on these slots are amazing. It feels like a real casino experience right from my phone. Love onyxslot
Really impressed with the variety of games available. It feels very professional and user friendly. Give jljl555 a try if you want some real fun.
Such a fun community and the rewards are actually attainable. I’ve had a few big wins here already. Visit yo88club and try your luck.
The winning streaks here are insane. I tried a few others but this one feels way more rewarding. Just log into mahagacor77login and see for yourself.
Finally found a platform that actually treats players right. The bonuses are generous and the support team is very helpful. Give phcrown44ph a try.
Just downloaded the app and it works like a charm. The installation process was super quick and it doesn’t lag at all. Definitely check out in777download if you prefer playing on mobile.
Found this site through a friend and I am glad I did. The bonuses are generous and the customer support is actually helpful. Give ph95jili a shot.
Everything works perfectly on my mobile browser. No glitches and the account management is very simple. Big thanks to jljl3login for the quality service.
The login process is seamless and I never encounter any glitches. Everything just works perfectly on 24jiliparklogin.
Really impressed with the payout speed here. It is rare to find a platform this reliable these days. Highly recommend brc333 to everyone.
The payment methods are very convenient and the deposits are processed almost instantly. It makes the whole experience much more enjoyable. Check out hokipaylogin today.
Finally found a platform that doesn’t lag during peak hours. The interface at ph68jllogin is super intuitive and easy to navigate.
I’ve been trying a few different sites lately and this one really stands out. The interface is super smooth and the payouts are fast. Definitely recommending k7win55 to my buddies.
If you are looking for a place with good odds and a wide range of games then look no further. wc888game is definitely a winner.
Solid platform with a great vibe. I appreciate the transparency and the fair play. If you are searching for a reliable spot, phtayacom is definitely it.
Best experience I have had with a Jili provider in a while. The odds seem fair and the animations are top notch. Cheers to phjilimacao for the great service.
Great platform with a very friendly community feel. I appreciate how straightforward the deposit and withdrawal process is. Give mumu86login a try.
Best platform for those who love fast paced action. Everything from registration to playing is very intuitive. I’m really enjoying my time at pkwc888 right now.
Super impressed with the mobile optimization. I can play on the go without any lag at all. Great job on ph75jili!
A solid choice for anyone who loves the casino atmosphere online. The live dealers are professional and the atmosphere is exciting. Join phbetpkcasino today.
Love the variety of games available here. It feels like a real casino right from my phone. Give bar222bet a try!
The mobile app is a game changer. It’s way more convenient than using a browser and everything loads instantly. You guys should grab the bdl444appapk right now.
I really appreciate the transparency of bralong777. The rules are clear and the winning experience is very exciting. I’ve had some great wins here recently! bralong777
Finally found a place where the login process is actually fast and doesn’t glitch out. Everything works perfectly on 59phlogin, definitely staying here.
Solid platform with a very professional feel. I feel safe depositing my funds here. Cheers to armorbet78.
I love how easy it is to navigate through the different categories. No lag and the graphics are top notch. I am spending a lot of my free time on idodin188 lately.
Really impressed with the bonus offers here. It feels like they actually care about the players. I am sticking with inyono7777 from now on.
The winning streaks here are insane. I managed to hit a big jackpot last night and the withdrawal was processed instantly. High praise for krcasinowinoui
The app version is a game changer. It is so much more convenient to bet on the go without any glitches. Highly recommend downloading br393betapk
Really impressed with the graphics and the overall vibe of the site. It feels premium and the games are super engaging. Try inzuplay
Clean design and very straightforward registration process. I was able to start playing in less than two minutes. Visit win444betoficial for a great experience.
I’ve been looking for a reliable spot like this for a while. The interface is super smooth and the payouts are fast. Definitely recommending pkuk999 to my mates!
The lite version is exactly what I needed for my older phone. It runs perfectly without lagging at all. Get it at bingoplusliteappdownload.
The app version is just perfect. I can play anywhere and the experience is just as good as the desktop version. Love using 881app on the go.